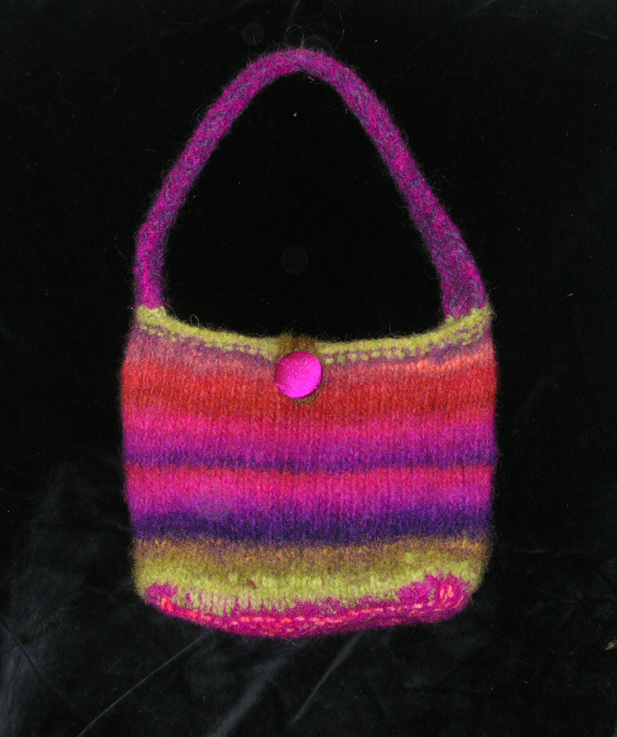
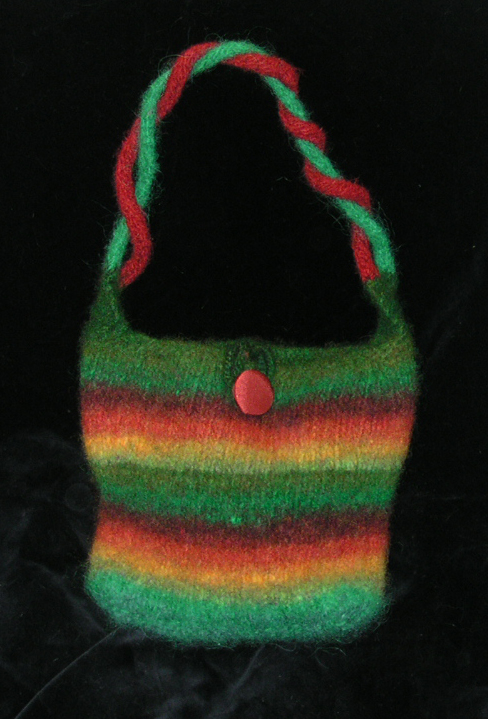
 One Skein of Noro Felted Purse – lots of options, 6”-8” X 6”-8” after felting
Stuff:
1 Skein of Noro Kureyon (100yd.)
Small amount of yarn(s) to co-ordinate with the Kureyon
7mm or 7.5mm needles (for base)
8mm 40 cm (16”) circular needle
6.5mm-8mm dpn for I-cord (optional)
Funky button (optional)
Tapestry needle or crochet hook for weaving in ends
How To:
This is a common purse method, starting with a rectangular knitted base from which you pick up stitches and then knit in the round. Because you are using a bit of extra yarn in addition to the Noro, you will end up with a nice-sized bag and you don’t have to worry about saving those last yards or having straps that come out too short.
With non-Noro CO 20-25 stitches (I use loop CO). I like to use a slightly smaller needle than the main bag and double the yarn for a more solid base.
Knit in garter st. at least 6 ridges (up to 10). It is easiest if your last ridge shows on the same side as the big loops from the cast-on.
With the circular needle, pick up stitches from the short side (however many ridges you knit), pm, then pick up from the CO edge the same number of stitches on the long top edge, pm, then pick up the other short side stitches, pm, and finally transfer the live stitches onto the circular needle and mark the beginning of your round.
Knit at least one round with your base yarn. If you have started with a small base, you can add a few stitches to the sides at this point. You can also add some stitches to the front and back to get a rounder shape. You might end up with something like: 10, 22, 10, 22.
If you want a taller bag, knit a few more rounds with a single strand, up to an inch or so – the Kureyon will be ‘featured’ in the middle of the bag.
At the beginning of a round, break base yarn and join Kureyon; continue with Kureyon until the skein is done – or you have reached the end of a round and don’t have much left. If you want to your bag to taper in at the top a bit, decrease a few stitches in the last few rows. You could have: 8, 20, 8, 20.
Rejoin base yarn (or a different colour), and knit a few rounds to match the bottom. BO purlwise – this makes a nice little ridge for the top. If you like joining your handles directly to the bag, leave a few live stitches in the middle of the sides (this is good for one strap) or on the fronts and backs within a few stitches of your side markers (for two straps).
Straps:
For straps, you can make 3, 4, or 5-stitch I-cord or garter stitch them with 5 or 6 stitches. If you use garter stitch, especially if you are only making one strap, you may want to double your yarn. Length can be whatever you like; I have found that 14"-16" make nice 'handles', but you need at least 20" or more for a shoulder bag style.
Finishing:
If you attach the straps before felting, they will blend nicely into the bag, especially if you are sewing them on. You can also make and felt a loop of crochet, braid or I-cord and sew it inside the top edge of the purse when you have finished felting, then sew a button on the purse front. I have found that since felting will twist the stitches a little, it’s better to attach a loop afterwards. You could also knit and attach a small flap in this manner.
posted by Pat Rowan at 11:25 a.m.
![]()
![]()

2 Comments:
I found your blog through a free felted bag pattern list. I love you creations.
Your pattern is a classic bag pattern I've been seeing a lot of variations of. I really like the way you give several options to choose in different places in the pattern. I'm a beginning knitter but love the creative part of adjusting patterns to fit my style. Your pattern makes that easy! Thanks!
Post a Comment
<< Home